1. Introduction
|-lib
|- data
|- questions.dart
|-models
|- quiz_questions.dart
|- main.dart
|- question_screen.dart
지난시간에 정의를 내렸던 questions_screen.dart에 있는, 데이터를 가지고 온다. 즉, 우리가 지정했던 질문,questions을 담고 있는 리스트를 가지고 오면 된다.
import 'package:adv_basics/data/questions.dart';


class QuestionScreen extends StatefulWidget{
  const QuestionScreen({super.key});

  @override
  State<QuestionScreen>createState(){
    return _QuestionsScreenState();
  }
}


class _QuestionsScreenState extends State<QuestionScreen>{
  @override
  Widget build(context){
    final currentQuestion=questions[0];
지난번 시간에 우리는 QuizQuestion class의 변수를 text,answers 두 개로 선정했던 것을 잊지말자. 또한 currentQuestion의 object는 '.' 을 통해서 접근가능하다. 예를들어, QuestionsScreenStateclass의 Text에 들어갈 말을 우리가 선언한 currentQuestion object의 text로 정하고 싶다면, 아래와 같이 변형을 주면 된다. Questions과 Answers도 동일하게 적용이 된다.
class _QuestionsScreenState extends State<QuestionScreen>{
  @override
  Widget build(context){
    final currentQuestion=questions[0];


    return SizedBox(
      width:double.infinity,
      child:Column(
        mainAxisAlignment: MainAxisAlignment.center,
        children: [
      //child 01
      Text(
        currentQuestion.text,
        style:TextStyle(
          color: Colors.white,
          fontSize: 25,

        )),
      //child 02
      const SizedBox(height:30),
      //child 03
      AnswerButton(answerText:currentQuestion.answers[0], onTap:(){},),
      const SizedBox(height:30),
      //child 04
      AnswerButton(answerText:currentQuestion.answers[1], onTap:(){},),
      const SizedBox(height:30),
      //child05
      AnswerButton(answerText:currentQuestion.answers[2], onTap:(){},),

      //child06
      const SizedBox(height:30),

      //child07
      AnswerButton(answerText:currentQuestion.answers[3], onTap:(){},)

    ],)
    );
  }
}
하지만 이 방법은 그리 선호되지 않는데, 이유는 우리가 직접 계속 수동적으로 질문과 대답을 일일히 접근하여 그에 맞게 적용시켜야 한다는 점이다.즉, 다수의 동일한 코드가 반복되어서, 가독성을 떨어뜨리게 된다. 더불어서, 현재 위에서 우리가 정했던 질문에 대한 대답이 4개 이지만, 경우에 따라선, 5개 또는 3개 등 답의 수도 고정적이지 않다. 이러한 문제들로 인해, 우리는 좀 더 색다른 방법으로 코드를 구현하고자 한다.
2. Iterable Data Structure Code
2.1 들어가기 전에
- ( List Methods: Map ) : python에서 사용하는 iterable data structure가 존재한다. 그것이 바로 map이라는 데이터 구조체이다. map구조는 대단히 단순한 편인데, iterable 한 자료구조를 받으면, 그 원소들을 하나씩 반환해주는 기법이다. 이때, map 구조체를 통해서, 반환되는 데이터들은 원본의 정보를 훼손하지 않 으며, 원본의 자료정보와 반환되는 정보들은 두 개 모다 메모리상에 적재된다.
- List 이란? List data structure을 사용하고 있고, 그 안에 있는 원소들은 다 wideget이여야 한다.
2.2 Write a better readbable code
앞에서 정의내린 _currentQuestion_을 정의 내린 iterable list값을, map method를 통해서 원소들을 반복시켜서 전달하면, 우리는 widget을 원소로 갖는 list를 반환하는 것을 알 수 있다. 이때 주의할 점이 있는데, sizeBox의 child부분은 List이라고 명시되어 있는데, map함수를 이용해서 반환된 currentQuestion.answer.map은 list 라는 것을 알 수 있다.
"SizedBox는 list안에 Widget만 있어야 한다고 명시되고 있지만, 우리 자료는 widget과 map함수로 반환된 nested list가 포함되어 오류를 내고 있는 것이다."
nested list안에 있는 widget을 unwrapping하기 위해선, '...'을 사용하도록 하자. 그럼 코드는 아래와 같이 깔끔해 지는데.
class _QuestionsScreenState extends State<QuestionScreen>{
  @override
  Widget build(context){
    final currentQuestion=questions[0];


    return SizedBox(
      width:double.infinity,
      child:Column(
        mainAxisAlignment: MainAxisAlignment.center,
        children: [
      //child 01
      Text(
        currentQuestion.text,
        style:TextStyle(
          color: Colors.white,
          fontSize: 25,)),
      //child 02
      const SizedBox(height:30),
      //child 03
      ...currentQuestion.answers.map((answer){
        return AnswerButton(answerText: answer, onTap: (){});
      })


        ]
  ));}
}
3. Layout Style
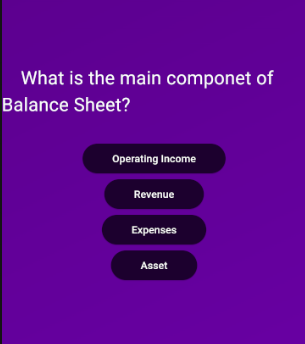
위 사진을 보면, 선택 버튼의 사이즈가 제각기 된것을 볼 수 있다.
step 1) Column 안의 _crossAxisAlignment: CrossAxisAlignment.strecth이 부분은 option 선택지를 모두 다 꽉 채워버린다.
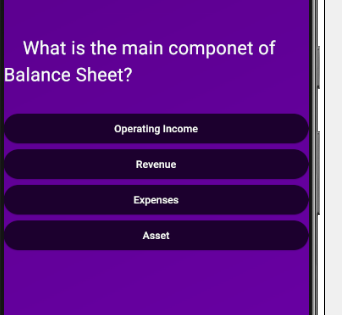
화면을 옆으로 꽉 채운 느낌은 우리가 원하는 방향은 아닌거 같다. 이를 약간 조정하기 위해선, 아래의 추가 옵션이 필요하다.
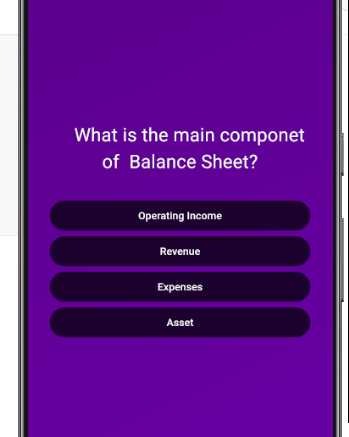
step 2) Column 전체 부분을 container의 child 부분으로 집어넣는 방법을 고려하도록 하자. 이렇게 Column의 child의 구성요소로 들어가게 되었다면, 우리는 선택지의 사이즈 규격을 조절하는 방법을 생각해야 한다. 이는 **"maring: const EdgeInsert.all"**이라는 것을 통해서 가능하게 한다.
step 3) 질문 text 또한 중앙에 위치하도록 할 건데, 이는 Text Class의 textAlign:TextAlign.center을 통해서 가능하다.
step1-step3을 전체적으로 구현한 코드는 아래와 같다.
class _QuestionsScreenState extends State<QuestionScreen>{
  @override
  Widget build(context){
    final currentQuestion=questions[0];


    return SizedBox(
      width:double.infinity,
      child:Container(
        //insert spaces
        margin:const EdgeInsets.all(30),
        child:Column(
        crossAxisAlignment: CrossAxisAlignment.stretch,
        mainAxisAlignment: MainAxisAlignment.center,
        children: [

      //child 01
      Text(
        //align the text to the center
        textAlign: TextAlign.center,        currentQuestion.text,
        style:TextStyle(
          color: Colors.white,
          fontSize: 25,)),
      //child 02
      const SizedBox(height:30),

      //child 03
      ...currentQuestion.getShuffledAnswers().map((answer){
        return AnswerButton(answerText: answer, onTap: (){});
      })

      ,const SizedBox(height:30)]))
  );}
}
'Front-End > Flutter' 카테고리의 다른 글
| 5. <Quiz APP>을 통한 Flutter Tutorial (0) | 2024.11.24 |
|---|---|
| 3. <Quiz APP>을 통한 project- Data model/ Dummy Data (0) | 2024.11.17 |
| 2. <Quiz APP>을 통한 Flutter Tutorial / Render Content Conditionally, Lifting State Up (0) | 2024.11.17 |
| 1. <Quiz APP>을 통한 Flutter Tutorial (0) | 2024.11.15 |